
Your terrarium is giving you signs it’s bursting at the seams? Here’s how to fix it before things go sideways!
If you’ve been growing your terrarium for a while, you’ve probably noticed things getting a little crowded in there. Knowing when and how to replant a terrarium is one of the most useful skills you’ll pick up as a terrarium keeper.
It sneaks up on you, honestly. One week everything looks lush and balanced, and the next you’ve got roots pressing against the glass, moisture building up excessively, and plants competing for every drop of light. That’s your terrarium’s way of asking for help.
The good news is that replanting isn’t complicated once you understand what to look for and how to approach it. With the right tools and a little patience, you can bring your miniature ecosystem back into harmony without losing the plants you’ve worked so hard to grow.
So, let’s get into it! Step by step, no guesswork involved. By the end of this guide, you’ll know exactly what to do and feel confident doing it.
Signs that your terrarium needs to be replanted
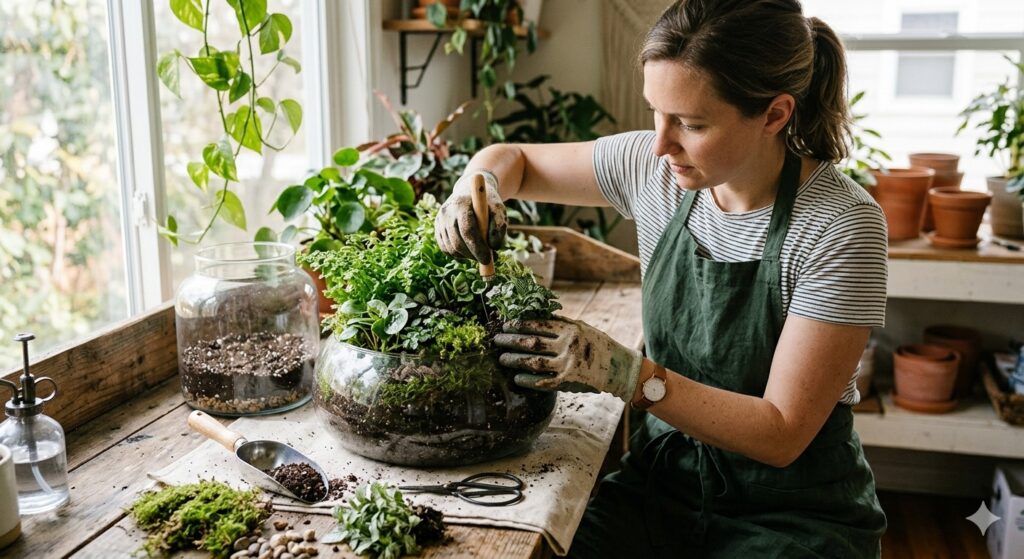
Before you grab your tools, it’s worth pausing to confirm that replanting is actually what your setup needs. Not every struggling terrarium is overcrowded, sometimes it’s a watering issue or a light problem.
That said, there are some very clear signs that space (or the lack of it) is the real culprit. Plants flopping against the glass, roots circling the bottom layer, and stems growing sideways instead of upward are all telling you the same thing: things have gotten too tight in there.
Roots pushing against the glass
When you see white or pale roots pressed flat against the inside of your terrarium walls, that’s a strong indicator that your plants have outgrown their space. Roots behave this way when they’ve explored every available inch of soil and have nowhere left to go.
At this point, the plants are also competing for nutrients in a shrinking patch of substrate. Eventually, this leads to yellowing leaves, stunted growth, and a general decline that’s hard to reverse without taking action.
Plants growing out of control
Some terrarium plants grow faster than others, and a few can take over the whole container if left unchecked. Ferns, creeping figs, and certain mosses are especially notorious for this, beautiful, but relentless.
When one plant dominates and starts shading out everything else, the balance of your entire ecosystem shifts. Smaller, slower-growing species get crowded out and eventually die, which can cause decay and humidity issues inside the enclosure.
Condensation that won’t clear up
Excessive, persistent condensation, especially in open terrariums, can sometimes point to overcrowding. Too many plants releasing moisture through transpiration creates a buildup that the system can’t manage efficiently.
If you’ve already adjusted ventilation and watering with no improvement, and your terrarium looks packed, it’s time to consider that the plant load might simply be too heavy for the container’s size. We also have an article about terrarium condensation you might want to check out here.
What you’ll need before you start
Getting organized before you open the terrarium lid saves you a lot of stress mid-process. Replanting is a hands-on job, and having everything within reach means you won’t lose momentum (or plants) partway through. Here’s a quick checklist of supplies to gather.
- Small trowel or terrarium spatula
- Long-handled tweezers or planting tongs
- Fresh substrate appropriate to your plant types (e.g., peat-free potting mix, coco coir, or ABG mix for tropical setups)
- Activated charcoal layer (for closed or semi-closed terrariums)
- Small scissors or pruning snips
- A spare container or tray to temporarily hold plants
- A spray bottle with clean water
- A soft cloth or paper towels for cleaning the glass
It’s also a good idea to work in a well-lit area so you can see exactly what you’re doing. Natural light is ideal — it helps you spot damaged roots and assess plant health much more easily than under artificial lighting alone.
How to replant a terrarium, step by step
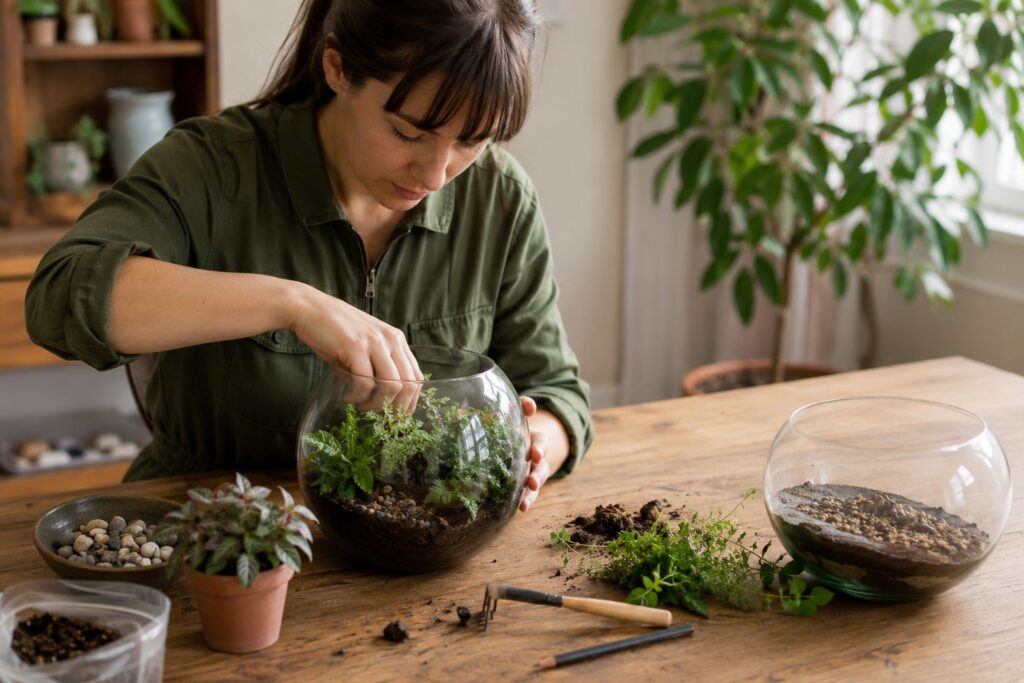
Now here’s the part you’ve been waiting for. The process of replanting is logical and straightforward when you break it down. Take your time with each step, and don’t rush. Your plants will thank you for it.
Step 1: remove the plants carefully
Start by gently removing each plant one at a time, working from the edges inward. Use your trowel or tongs to loosen the soil around the roots before lifting, rather than pulling directly upward, that can snap roots or damage the crown of the plant.
As you remove each plant, place it in your spare tray and give the roots a quick inspection. Look for rot (soft, dark, mushy roots), dead root sections that need trimming, or pests that might have been hiding in the substrate. Now is the perfect time to do a clean-up before anything goes back in.
Step 2: clear out and refresh the substrate
Once the plants are out, scoop out the old substrate. Depending on how long it’s been in use, it may be compacted, depleted of nutrients, or harbouring dead organic matter. Fresh substrate makes a significant difference to plant health going forward.
If you’re keeping the same container, give the interior walls a gentle wipe-down with a damp cloth. You don’t need any cleaning products, just water is fine. Make sure your drainage layer (gravel or leca) and charcoal layer are still intact at the bottom, or replace them if they’ve degraded.
Step 3: decide which plants are coming back
This is the step most people hesitate on, but it’s important: not every plant needs to go back in. Some might be too large now, damaged beyond recovery, or simply not working aesthetically with the design you have in mind.
Set aside any plants that have outgrown the terrarium, and consider rehoming them to a larger pot or container. Be honest about what fits and what doesn’t. Overcrowding is exactly what you’re trying to solve when you replant a terrarium, so don’t undo your work by squeezing too much back in.
Step 4: trim roots and foliage before replanting
Before anything goes back into the container, give each returning plant a light trim. Remove any dead or damaged leaves, and prune back roots that are excessively long or circling in an unhealthy pattern.
Pruning roots might feel counterintuitive, but it actually stimulates healthy new growth and helps the plant settle into its refreshed space more easily.
Use clean, sharp scissors and make smooth cuts, jagged cuts invite disease. Let the trimmed roots air for a few minutes before replanting if you can.
Step 5: replant with intention
Add your fresh substrate to the container and create small wells or planting pockets for each plant. Start with the largest or tallest plants first, positioning them toward the back or center depending on your terrarium’s orientation, then fill in with smaller plants around them.
As you replant a terrarium with this fresh layout, think about spacing. Give each plant room to grow without immediately touching its neighbour. Press the soil gently around each root system to eliminate air pockets, then mist lightly with your spray bottle to settle everything in.
Caring for your terrarium after replanting
The first two weeks after replanting are a recovery period, and it’s normal for plants to look a little droopy or stressed while they adjust. Don’t panic! This is expected, and most plants bounce back quickly with the right care.
During this time, keep the terrarium out of direct sunlight and in a spot with bright, indirect light. Direct sun can scorch stressed plants, especially when they’re still establishing new root contact with the substrate. Indirect light gives them energy without overwhelming them.
Watering after a replant
Hold off on heavy watering for the first few days. The fresh substrate likely has enough moisture from being misted during replanting, and overwatering at this stage can lead to root rot in plants that are already vulnerable.
Check the soil with a finger. If it feels moist an inch down, you’re good to wait. After the first week, resume your normal watering routine gradually.
Closed terrariums may need very little additional water at all, since condensation will recycle moisture internally. Open terrariums dry out faster, so keep a closer eye on those.
Monitoring for signs of stress
Watch your plants daily during the recovery window. Yellowing leaves can indicate overwatering or root damage; browning tips might point to low humidity or light stress.
Both are manageable if caught early, so stay observant rather than assuming everything is fine. If a plant continues to decline after two weeks despite correct care, it’s worth removing it before decay affects the rest of the terrarium.
Sometimes a plant just doesn’t make it through a transplant, and that’s okay. It’s part of the process.
How often should you replant a terrarium?
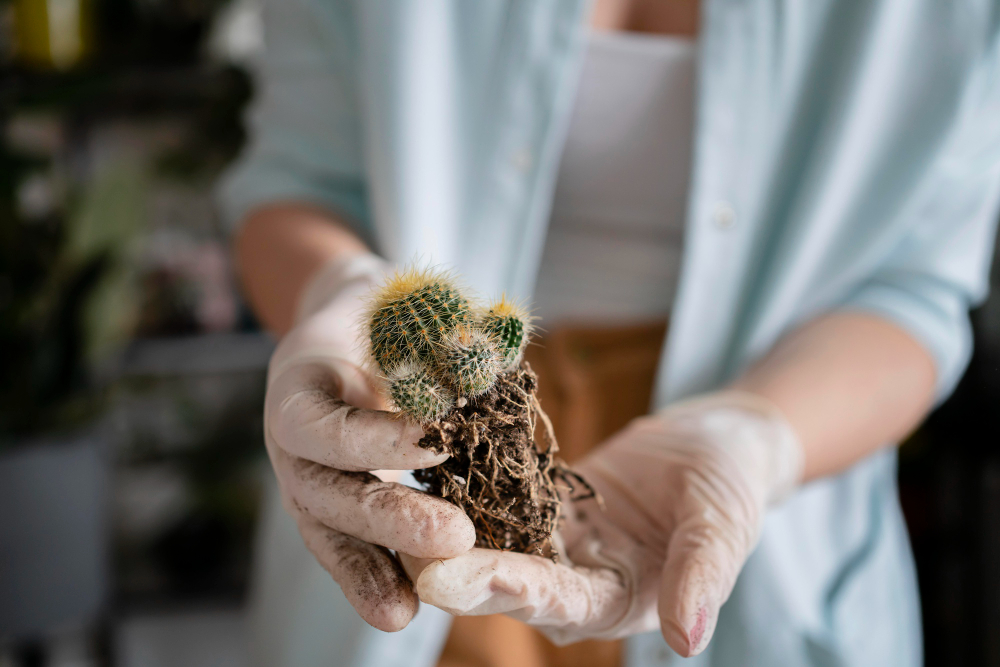
There’s no hard rule here, because so much depends on what you’ve planted and how fast your species grow. However, most well-maintained terrariums benefit from a full replant every one to two years, with lighter maintenance (trimming, removing dead material) done in between.
Faster-growing setups (particularly tropical terrariums with ferns, selaginella, or creeping plants) may need attention sooner. Slower setups with succulents or cacti can often go longer without intervention, since those plants grow at a much more leisurely pace.
| Terrarium type | Suggested replant frequency |
|---|---|
| Tropical / closed | Every 12–18 months |
| Open with fast growers | Every 8–12 months |
| Succulent / desert | Every 18–24 months |
| Moss-only setups | Every 2 years or as needed |
The best indicator is always the plants themselves. If they’re looking healthy and the container still has breathing room, you don’t need to intervene just because time has passed. Trust what you see.
Keep your terrarium healthy between replants
Replanting gives your terrarium a fresh start, but the habits you keep in between are what determine how long that fresh start lasts. A few consistent practices make a big difference over time.
Trim plants regularly don’t wait until something is completely out of control. A light prune every few weeks keeps fast growers in check and prevents any single plant from dominating. It also lets you catch early signs of disease or pest activity before they spread throughout the container.
Cleaning the glass
Keeping the glass clean is more important than it might seem. Algae, mineral deposits, and condensation residue all block light and make it harder to see how your plants are really doing. A gentle wipe with a damp cloth on the inside (when accessible) and outside keeps things clear.
For mineral spots from hard water, a diluted white vinegar solution works well on the outside of the glass. Just make sure none of it gets inside the terrarium, as even small amounts can disrupt the soil pH and stress your plants unnecessarily.
Monitoring moisture and airflow
For closed terrariums, the moisture balance is self-regulating most of the time, but it’s still worth checking in. If condensation is covering more than half the glass most of the day, crack the lid slightly for a few hours to let some humidity escape.
Too much moisture sitting on the glass long-term can encourage mold. Open terrariums need more active monitoring, especially in warm weather or heated indoor environments.
When you replant a terrarium and restart its cycle, take the opportunity to reassess its placement. Sometimes moving it a few feet from a heater or window makes a surprisingly large difference to moisture retention.
You might also love reading this
Maintaining a terrarium is an ongoing, rewarding process and replanting is just one part of the bigger picture. There’s another important skill that pairs beautifully with what you’ve just learned, and we think you’re going to find it incredibly useful.
Knowing how to trim plants properly keeps your terrarium tidy between replants and reduces the chances of things getting chaotic again too quickly. It’s a simple skill, but one that makes a genuine difference to the long-term health and appearance of your setup.
We’d love for you to check out our article on how to trim plants in a terrarium without mess. It walks you through the whole process in a friendly, practical way that’s perfect for beginners and experienced keepers alike.
Head over and give it a read. Your future self (and your terrarium) will genuinely thank you for it. The more tools you have in your terrarium care toolkit, the easier and more enjoyable the whole hobby becomes.