
Your plants are getting unruly, and you’re not sure where to start? Here’s everything you need to know!
If you’ve ever looked at your little glass garden and thought, “This thing is getting out of hand,” you’re definitely not alone. Learning to trim plants in a terrarium is one of those skills that sounds intimidating but really isn’t once you know what to do.
The good news is that most terrarium plants are pretty forgiving. A clean cut in the right place can actually encourage bushier, healthier growth, and your setup will look so much more intentional and balanced afterward.
That said, trimming inside a glass container does come with its quirks. You’re working in a confined space, often with delicate root systems nearby and a substrate you really don’t want disturbed too much.
So before you grab the nearest pair of scissors and start snipping away, let’s walk through the whole process together. You’ll finish this article with a clear plan and no more excuses to put it off.
Why trimming matters more than you might think
A lot of terrarium owners underestimate how fast things can go sideways when plants aren’t trimmed regularly. One overgrown fern or a creeping moss that’s taken over can throw the entire ecosystem out of balance, blocking light, suffocating smaller plants, and trapping excess moisture.
Trimming keeps your terrarium looking curated rather than chaotic. Beyond aesthetics, it also promotes airflow, which is especially important in closed terrariums where humidity can get very high. Good airflow reduces the risk of mold and rot, which are two of the most common problems in miniature gardens.
Moreover, when you trim plants in a terrarium on a regular schedule, you stay in tune with what’s happening inside. You’ll notice early signs of disease, pest activity, or root crowding, issues that are much easier to deal with before they spiral.
Think of it less as a chore and more as a check-in with your setup. A monthly trim session keeps everything healthy and gives you a chance to make small adjustments before small problems become big ones. You can also check all about how to properly clean a terrarium here.
Tools you’ll need before you start
Getting the right tools ready before you begin makes the whole process smoother and much less messy. Here’s what you’ll want to have on hand.
| Tool | Why you need it |
|---|---|
| Long-handled scissors or bonsai shears | Let you reach the back of deep terrariums without disturbing surrounding plants |
| Tweezers or long tongs | Useful for removing trimmings from tight spots |
| A small brush or dry paintbrush | Helps sweep debris off leaves and away from the substrate |
| A spray bottle with water | For misting before trimming to reduce dust and static |
| A clean cloth or paper towels | To wipe the glass after trimming |
You don’t need anything fancy or expensive. In fact, a good pair of long-nosed scissors and a set of aquarium tweezers will handle 90% of terrarium trimming jobs just fine.
How to trim plants in a terrarium: step by step
Once you get the hang of the sequence, trimming flows pretty naturally. These steps will walk you through the whole process from start to finish, so you can get in, do the job cleanly, and get out without stressing your plants or making a mess of your setup.
Step 1: prepare your workspace and tools
Before you open the lid or remove the front panel, get everything within arm’s reach. Lay out your tools, have a small container ready for clippings, and make sure you’re working in a well-lit space so you can see clearly inside the terrarium.
Wipe your scissors or shears with a bit of rubbing alcohol before you start. This might seem like overkill, but introducing bacteria to a freshly cut stem can cause rot and inside a closed or semi-closed terrarium, that can spread quickly.
Give the plants a gentle mist a few minutes before you begin. Slightly damp foliage is less likely to shatter or create a dusty mess when cut, and it makes the whole trimming session a little cleaner overall.
Step 2: assess the plants before cutting anything
Take a good look at the whole picture before you make a single cut. Identify which plants are overgrown, which are struggling, and where the visual balance feels off. This saves you from impulsive cuts you might regret.
Look for stems that are leaning against the glass, leaves that are yellowing or mushy, and any growth that’s creeping into another plant’s space. These are your first targets. Mark them mentally, or physically with small sticks if your terrarium is large, before you begin.
It’s also worth noting which direction each plant naturally grows. Trimming with that growth direction in mind leads to a more natural-looking result, rather than a flat-topped or choppy appearance after the session is done.
Step 3: start with the tallest and most overgrown plants
Always begin at the top and work your way down. Trim the tallest stems first so any falling debris doesn’t land on plants you’ve already cleaned up. This simple habit alone makes a huge difference in how tidy the process feels.
When you trim plants in a terrarium that have gotten leggy or tall, cut just above a leaf node, that’s the point where a leaf or branch meets the stem. Cutting here encourages the plant to branch out rather than continue growing straight up, which gives you a fuller, denser result.
Use slow, deliberate cuts rather than rushing. In a tight space, a hasty snip can easily nick a neighboring plant or disturb the substrate around the roots, which is exactly what you’re trying to avoid.
Step 4: remove all clippings immediately
This step is non-negotiable. Every single piece of trimmed material needs to come out of the terrarium right away. Leaving clippings inside, especially in a closed or humid setup, is a fast track to mold, fungus gnats, and rot.
Use your tweezers or tongs to fish out every leaf, stem, and bit of debris. It helps to work in one section at a time and clear it completely before moving on to the next. That way nothing gets buried under fresh trimmings as you go.
If a small piece falls into the substrate and you can’t retrieve it easily, use a dry paintbrush to gently sweep it toward an easier-to-reach spot. Never dig into the substrate aggressively — you’ll disturb roots and can introduce air pockets that damage the root system.
Step 5: clean the glass and finish up
Once all the trimming is done and every clipping is removed, take a moment to wipe down the inside glass with a clean, damp cloth. Sap, moisture droplets, and fine debris tend to cling to the sides during trimming, and cleaning it up now keeps your terrarium looking its best.
When you trim plants in a terrarium and then leave without cleaning the glass, that residue can dry into cloudy patches that are much harder to remove later. A quick wipe while things are still fresh takes about 30 seconds and makes a noticeable difference in clarity.
Close the lid or replace the front panel, mist lightly if the terrarium seems dry from all the air exposure, and step back to admire your work. You’ve earned it! The whole thing should look noticeably more balanced and intentional now.
Most common mistakes to avoid
Even experienced terrarium keepers make a few classic trimming mistakes. Knowing them ahead of time saves you a lot of frustration.
Cutting too much at once is probably the most common one. It’s tempting to go all in when a plant has gotten really overgrown, but removing more than a third of any plant’s foliage at once can send it into shock. Take it gradually, trim a bit this week and a bit more next time if needed.
Using dull tools is another one that causes more damage than most people realize. A dull blade crushes plant tissue rather than slicing cleanly, which creates jagged wounds that are slower to heal and more vulnerable to infection. Sharp tools make cleaner cuts, period.
Forgetting to sterilize is surprisingly common too. Even if your scissors look clean, they can carry bacteria or fungal spores from your last use or from handling soil before trimming. A quick wipe with alcohol before each session is a small habit with a big payoff.
How often should you trim?
There’s no one-size-fits-all answer here, because it depends entirely on what’s growing in your terrarium and how fast it grows. That said, a monthly check-in is a solid baseline for most setups.
Fast-growing plants like fittonia, baby tears, or certain mosses may need attention every two to three weeks during their active growing season. Slower growers like succulents or air plants need far less frequent trimming, sometimes just two or three times a year.
When you trim plants in a terrarium consistently on a schedule, you’ll quickly develop a feel for your specific setup. After a few sessions, you’ll know instinctively what’s on track and what’s starting to get ahead of itself, which makes each session faster and easier.
The key is not to wait until things look out of control. Little and often beats a big dramatic overhaul every time, both for your plants’ health and for your own sanity.
Keeping moss tidy without damaging it
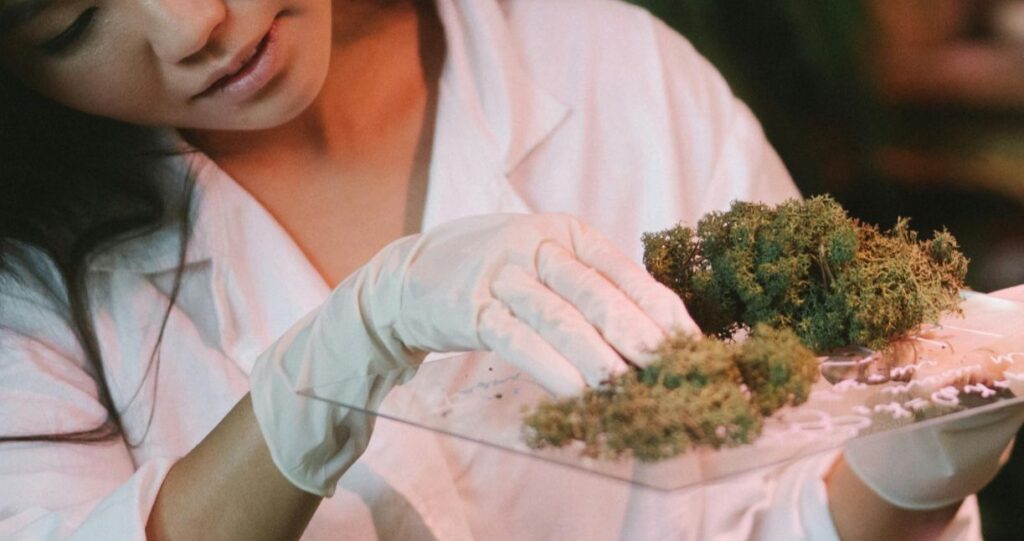
Moss is one of the trickiest things to trim in a terrarium because it doesn’t respond to cutting the same way a leafy plant does. Rather than cutting it like you would a stem plant, the goal with moss is more about controlling its spread and removing any dead or brown sections.
Use your scissors to trim along the edges where moss is encroaching on other plants or creeping up the glass.
For the top surface of the moss carpet, a light trim with small scissors can help keep it even and prevent it from getting too thick and dense, which traps moisture and can cause rot underneath.
Also worth reading: why is my terrarium plant dying?
If you’ve been keeping up with trimming and your plants still don’t look quite right, there might be something else going on. It happens! Even well-maintained terrariums can develop issues that have nothing to do with overgrowth or pruning technique.
We put together an in-depth guide that walks you through the most common reasons terrarium plants start declining: everything from lighting problems and overwatering to root rot and soil composition. Each issue comes with a clear explanation and a practical fix you can apply right away.
Head over and check out “Why is my terrarium plant dying? (and the fix)”, you might find the answer you’ve been looking for. It pairs really well with what you just read, since a healthy plant responds much better to trimming than a stressed one.
Go ahead and give it a read when you’re done here. Understanding what your plants need, and catching problems early, makes every part of terrarium care, including trimming, a whole lot easier and more rewarding.